

Hello again, all. It really doesn’t seem like two minutes since I was sharing with you the processes of putting together my first portable medieval oven. After two years of wonderful productivity (and a very steep learning curve) the little clay oven finally gave itself a Viking funeral. Taking notes of the mistakes I had made previously, I quickly procured a successor and set about getting Oven 2.0 up and running. For anyone hoping to do the same, here is a revised guide to setting up a practical, productive and above all long lived portable oven setup.
Step 1: Procure your oven
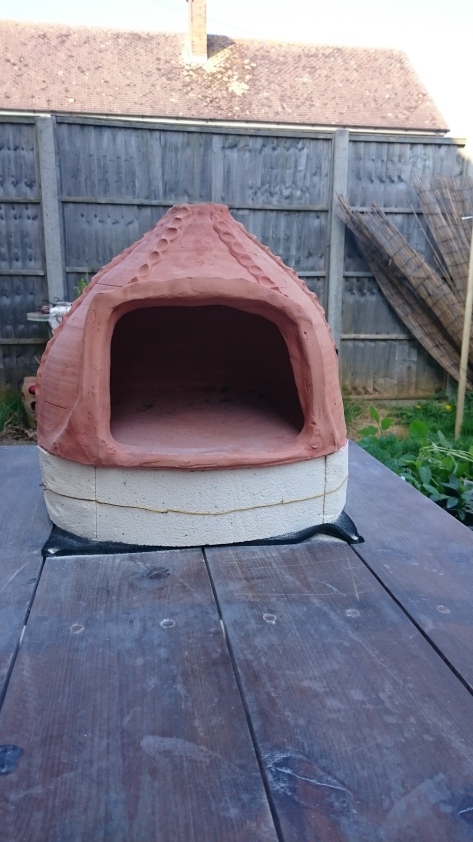
I used a fabulous terracotta clay inner from Trinity Court Potteries who were the people who also made my last one. Using a pre-fired inner is a bit of a cheat but it essentially cuts out a step and makes life a whole lot easier.
Step 2: Give it a place to live
Being clay, once it has been used to cook a few times, your oven will inevitably crack. Do not let this worry you, it is the nature of the material that it is made from and an unfortunate fact of life when it comes to clay ovens. In order to preserve its lifespan it needs a solid base. This base can be used to transport the oven as a solid unit and makes life a whole lot easier. An important consideration however is that the oven (being an oven) will get incredibly hot and if not properly insulated will burn through the table (see “Viking funeral”).
Step 3: Get your kit together

Once you have your oven liner and a suitable table or trestle, you will need:
A piece of carbon fibre ‘slack blanket’ proofed to 1300 degrees C
As many insulated kiln bricks (NOT fire bricks) as will fit under the oven in a single layer
Brass picture or craft wire; sturdy but not so firm that you can’t twist it. It is important to use brass or copper as it reacts well with heat and won’t oxidise and cause problems like ferrous metals will.
A bag of browning plaster; this generally comes in large bags but don’t be put off by the amount. You will use a surprising amount and also need some left over for running repairs during the life of the oven.
Straw; the usual pet bedding stuff will do nicely
Brass carpet tacks
A hacksaw; make sure that it is deep enough to cut through the bricks
Pliers
A suitable container to mix plaster in (I used my wheelbarrow)
A drill
A file
A marker pen
Dust mask
Safety goggles
Step 4: Make a start
Start by fixing the slack blanket onto the table top. This is the last line of defence for the wood of the table, it is also important that it does not shift about and cause the oven to come loose. Make sure that the piece is not too large as it will show from under the plaster and look messy.

Step 5: Bricks
Place the kiln bricks on the blanket and put the oven on top. With your marker pen, mark out the shape of the oven, then take the oven off again so that you can get to the bricks.

The bricks can then be removed and sawn into shape. Kiln bricks are very light and can easily be cut with a hacksaw. This will produce a lot of dust so don’t forget the mask and goggles.
When the bricks are roughly shaped (I used the corners cut off the back ones to fill the gap at the front), use the file to neaten up the edges and give a neat finish.

Step 6: Secure the base
Secure the kiln bricks in place with brass wire, again to ensure that they do not move. It is not necessary to secure them through the table, but make sure that they are wrapped tightly. When that is done, place the oven on top.
Step 7: Secure it to the table
Drill holes in pairs around the perimeter of the kiln bricks. I drilled pairs a 2 and 10 o’ clock and at 6 o’clock.
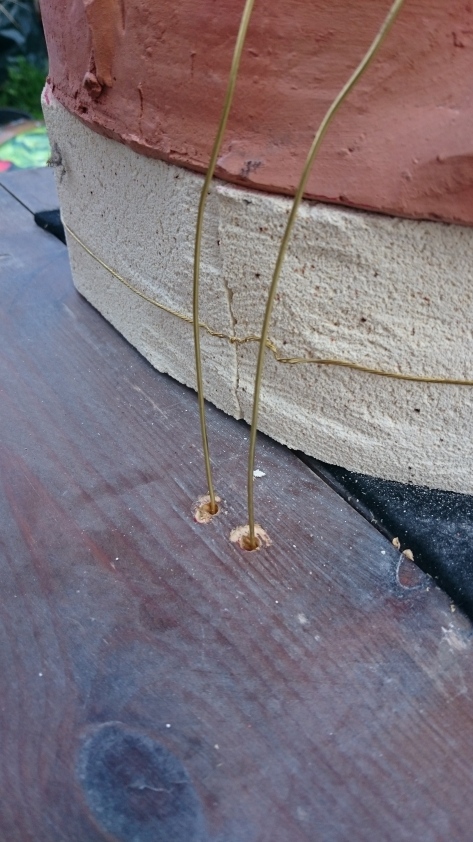
Wrap the brass wire around the oven and through the table so that it is firmly attached. When it is firmly attached and there is no movement whatsoever when pushed, twist the wire to secure it firmly and nip off the ends to give a neat finish.

Step 8: Plaster
In a large container, mix the plaster with water and a few handfuls of straw to a thick , smooth consistency (a stick should be able to stand up in it but it shouldn’t look ‘biscuitty’ in any way).

When mixed, apply it to the oven starting at the bottom and working up.
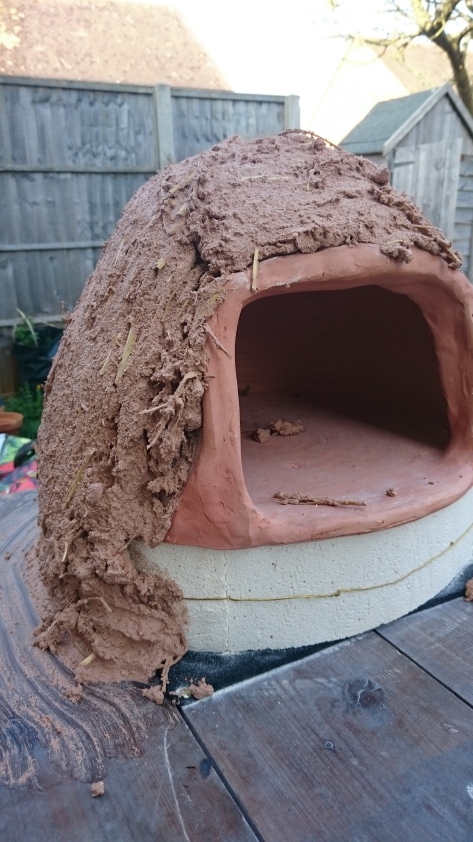
Keep going until you have a layer at least an inch thick, maybe more.

Step 9: Patience
When plastered, leave your oven to dry for at least a week. Resist the urge to fire it until it has dried out for a good while as this will cause your oven to crack very badly. I have put a loo roll tube into the chimney to stop plaster falling in.

Step 10: Fire (see section on laying a fire for more info on this)
Once the oven has dried out, lay a small fire in the centre of the oven and keep it burning for about half an hour.

After this time, gradually increase the size of the fire by adding bigger sticks . Resist the urge to try and cook anything at this time, the oven needs to dry out first. Be particularly vigilant in making sure that the underside of the table remains cool. If you have done your job correctly, it should get no hotter than a warm cup of tea after a sustained burn. When the moisture starts to leave the plaster, the oven will start to steam and you may find condensation will form on the underside of the table.

Note the steam forming over the dome
Let the fire burn out after about an hour. Repeat this step for as many times as you are able to dry the plaster (I did it three times over three days), after which time your oven should be ready to cook.


Hahaha! it’s own viking funeral 😛 very nice post! I feel like making one now. I love medieval history.
LikeLike